Thursday, February 23, 2012

My first two fondant cakes

 This is a flashback post. I thought it might be appropriate to highlight where I started with fondant.

I remember seeing this incredible cake my sister-in-law, Jenn, made for my brother's graduation I think - it was one of those multi-layer cakes where the layers are askew. A few years later, we were talking about fondant and I was saying it was too hard to do. Jenn gave me the recipe for marshmallow fondant, so I thought I would try.

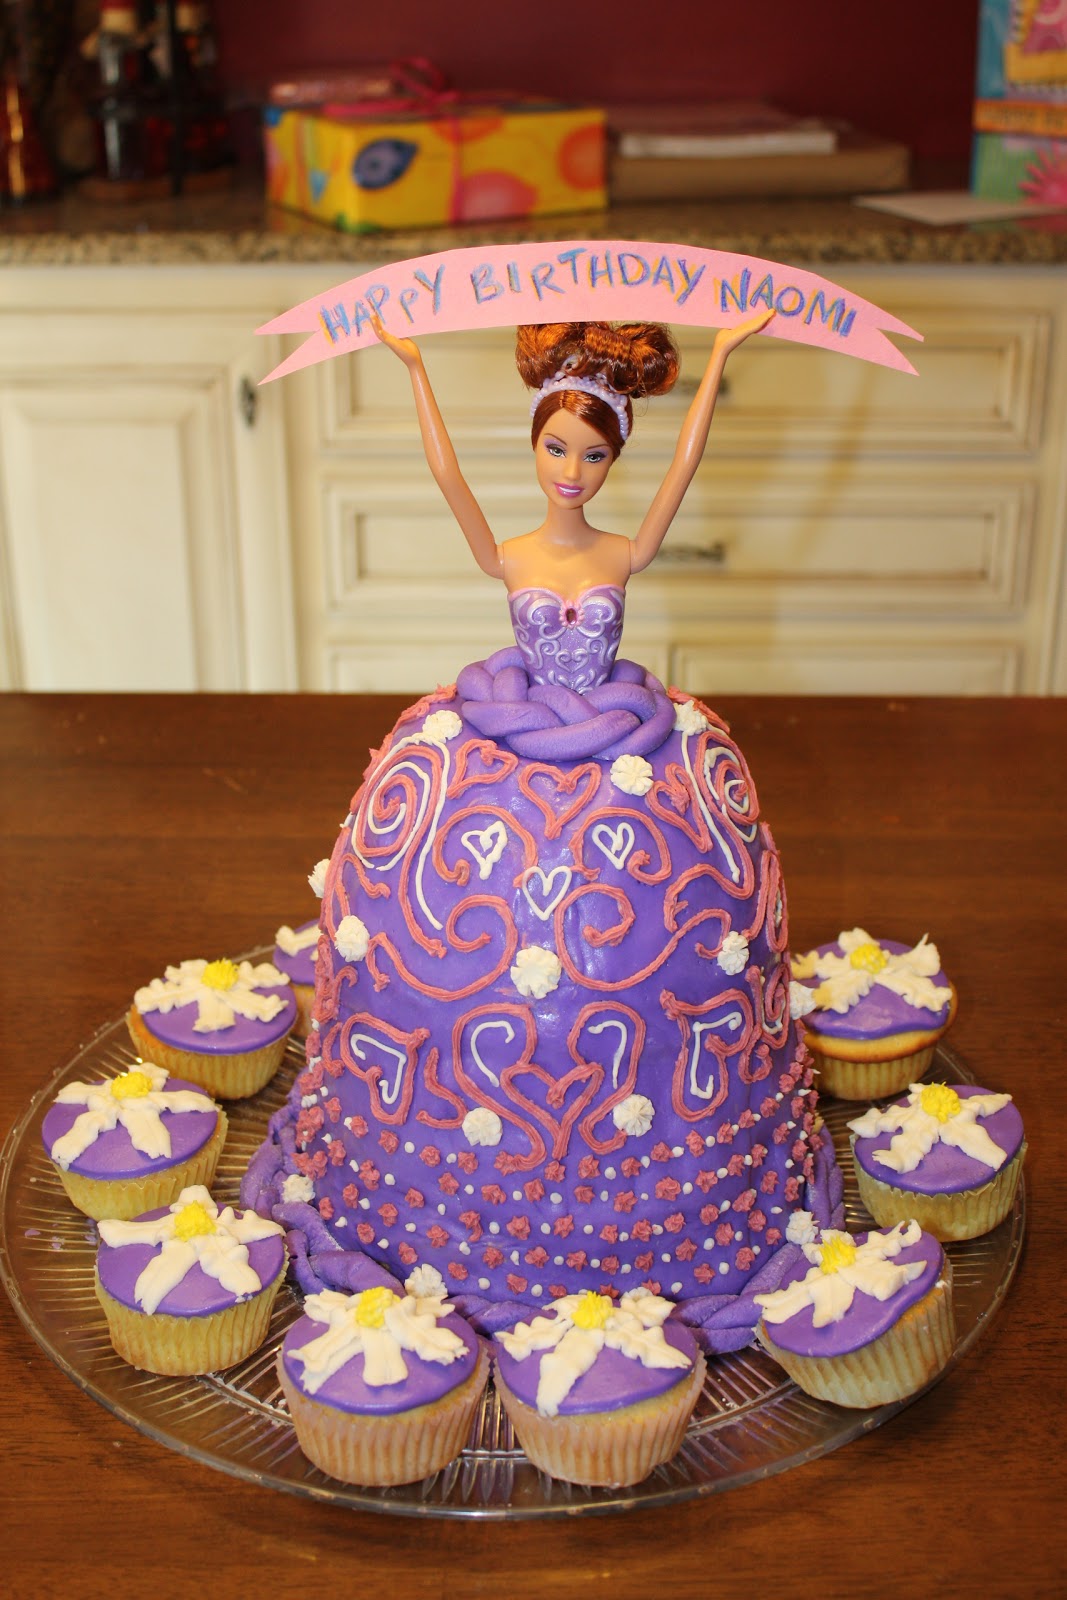
Once I figured it out, it really wasn't hard at all. The first cake I did is shown here on the left - your standard Barbie cake. It was great for me because all I really did was cover the dress part with fondant. You can't see it, but I covered up my flaws with those icing details. And, of course, you can see my awesome buttercream work on the cupcakes - ha!

My second cake was a bit more ambitious as I had to carve the cake into a shape. In this case, "King Boo" from Mario Kart. Obviously this was for my son. This was my first attempt at covering a shaped cake with fondant. What I love about fondant is the face that you can hide so many flaws in the cake by just laying fondant over it. Wonderful! I was pleasantly surprised when the cake turned out great. It wasn't as hard as I expected it to be. I know you are loving my foil-covered cookie sheet that I put it on, but I wasn't thinking presentation at this point. I was more concerned about getting it to look like Boo. I think it turned out pretty great!

This is where I started... we'll see where I go from here!

Monday, January 30, 2012

Happy Smurfday Cake

This cake takes me back to my childhood, when everything was "Smurfy." Everything was also "berry" this and "berry" that, too, but this cake is not about Strawberry Shortcake (though I can still smell the purple pieman figurine even now as I reminisce). Ha!


My client wanted a Smurf cake for her daughter's birthday, so we came up with the idea of a mushroom with a couple figurines. Her daughter loves Brainy Smurf, so we were definitely going to have him on the cake. And you can't have Brainy without Smurfette, right?

Because I am a perfectionist, the figures took me way longer than they should have. First, it took me forever to get the color I wanted. Once that was set, I can't tell you how many times I shaped and re-shaped the heads. I finally ended up with what I thought was a good representation. I rested Smurfette on a wine bottle to allow her dress to dry without losing the shape.

Now, here's the part where I should have taken more pics, but my neighbor dropped by and we ended up chatting while I made the cake. For the cake base, I just used a 10" cake. For the mushroom, I made a 6" cake and then used the Pampered Chef large batter bowl for the mushroom top. The only problem I ran into, was AFTER I had covered the mushroom top and base with fondant. I put the top on the base and they were the same size. Well, no problem, I thought. It will look fine. Then I put them on the base, and realized the figures would not fit because the base was too large. So, off went the fondant, and I had to trim a couple inches off of the base. More fondant, and it was much better! Thankfully my cake was dense enough that cutting off the entire crust didn't ruin it. I was concerned I would end up with a crumbled mess and have to make a new cake.

I added details around the cake, like windows, a door, stone path and flowers. I decided against the chimney but you could add that as well.

The only thing I would change about this cake would be to make a smaller mushroom. It ended up being top-heavy and was a challenge to transport. I was worried I would not have enough cake, as usual, but this was more than sufficient for the client's needs.

Another fun, challenging cake project in the books!

Tuesday, January 24, 2012

Whimsical Birthday Cake

I have to admit that when I was faced with making this cake I was stumped. We were celebrating my mom's 70th birthday, which normally would be a joyful occasion, but my mom has been sick and in the hospital for several weeks, so I was feeling down.

What I really wanted was to make it all better with a cake, but that is obviously unrealistic. So, without being too much of a downer, let's just say I was uninspired.

Basically, I took a look at the colors of fondant that I had on hand, and decided to just wing it without a plan in mind. Thankfully it came together! I didn't want to emphasize her age, but wanted to symbolize it somehow, so that's why there are seven candles. Those were fun and pretty easy to make. My 4 year old nephew said, "Those aren't REAL candles!" But you can't eat real candles! Once I told the kids they could each have a candle, they didn't care if the candles were real or not - they were dessert!


So even if the cake isn't an incredible masterpiece, it helped to put a smile on my mom's face, and that's all that matters.

Monday, January 9, 2012

Cookie Fail

As we begin a new year, I thought I would begin with a baking FAIL. What could be better? I can only go up from here.

From Wilton

I usually have chocolate chip cookies in my freezer- they stay remarkably fresh frozen, and I always have a cookie at my disposal when I need one (which is pretty much every day). I like them frozen better too. I also like frozen grapes and peas, but that's obviously another subject.

Well, today I did not have any cookies in the freezer, and I needed one, so I thought I would try this idea I saw on Pinterest for cookie bowls. You turn a cupcake pan upside down and put cookie dough on the bottoms, bake, and voila! Cookie bowls for ice cream. If you look at the picture and DON'T READ THE RECIPE, as I obviously did, you would think at first glance that these are chocolate chip cookies. So that's what I did.

And this is the result:

I went back to the link and read that it's actually SUGAR cookies (not sure what those black specs are in the picture). And it's probably a special crunchy kind that doesn't spread as much. Anyway, mine tasted awesome. Warm, gooey and chocolatey. I think I will go have another.

Oh, and this post is also for those of you who think everything I bake turns out perfect. Just keeping it real!